Guerrilla gardening
Growing your own lilly pilly from foraged seeds
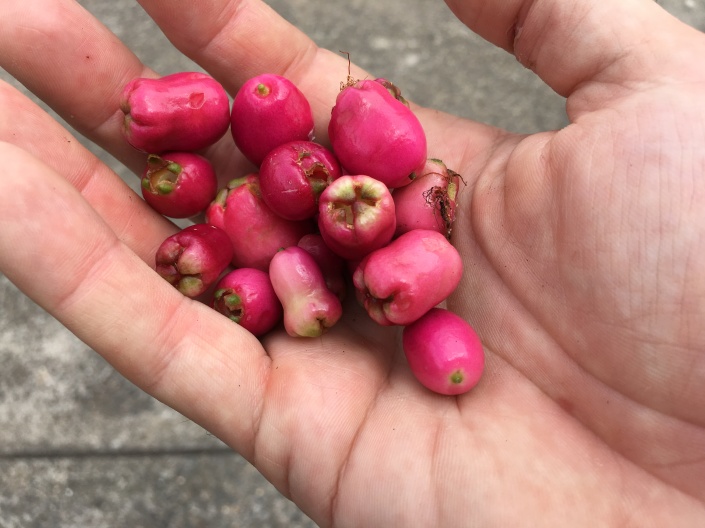
This is the season for lilly pillies (syzygium and acmena) to flower and fruit. And if you want a lilly pilly in your own garden, it’s easy: just find a local bush that has fruit you like the taste of.
The outer flesh of the fruit prevents germination, so eat that off. Then plant the seeds in some seed-raising mix. Wait and watch them grow!
We’ve found them to strike very easily and to grow vigorously. Once they get bigger, divide them into individual pots. Then transplant them into the garden when they’re ready.

These particular plants are Syzygium Leuhmanii, which have a crisp cinnamon taste. We’re growing a whole hedge of them down at the farm, from Lewisham-collected seeds 🙂

Weedy resources from the Department of Agriculture
Whether you’re in the city or the country, you have to wage a constant war on weeds. Many are hard to kill, some are poisonous.
Others, however, are hard to identify. And if you don’t know what it is, how do you know whether to pull it out (and how)?
When down at the recent Small Farm Field Day, I visited the stand manned by the Department of Agriculture. They pointed me to an excellent phone app, called NSW WeedWise.
This contains a comprehensive collection of weeds, including photos and descriptions. It also indicates how serious a weed is, and whether you’re required to destroy it.
A lot of the weeds I already knew about, but I was pleased to learn about Moth vine. This looks quite like choko, and it’s growing on the back fence of the convent.
Far from being edible, however, it has sap that’s poisonous, and it spreads itself liberally when the seed pod bursts open.
Another day, another weed. Download the app from the Apple Store or Google Play.

Railway passage garden going strong

Back in 2014, I started planting alongside the pedestrian pathway that runs from Lewisham Station through to West St. There have been ups and downs, but I’m now up to 30 metres of garden, with a mix of small trees, bushes and ground covers (all natives).
And then I paused, as I’d been reported to the council for planting trees (shock horror!).
I ended up having a visit from the tree officer at Inner West Council, who turned out to be delightful. Not only did he approve of the work (his first question was: “are you going to do the rest?”), but he offered some free trees.

A month or so later, the council planted eight Lilly Pillies, plus a variety of other trees. This has doubled the length of the garden, to approximately 60 metres. Which is about half of the entire length of the passageway. Now we’re getting there!
I offered to mulch under the council trees, so I collected free cardboard boxes from the recycling bins at Pig and Pastry, plus free mulch from the Council. Two full ute loads of mulch later, I’m only half way. Phew! Still it’s good exercise, and there’s a palpable sense of progress now.
I’ll be at this for a few years yet, so say hi if you see me working away. And any volunteer help would be gratefully received!
Will we get macadamias this year?

The one request from the nuns when I started the guerrilla gardening of the convent land was to plant a macadamia tree. Apparently at a convent they stayed at in the country they had a wide range of fruit trees, and fresh macadamias were a particular delight.
The tree I planted 4 years ago is still small, perhaps 3m high. It’s had a rough time, with kids splitting the trunk early in its growth, plus various periods of drought conditions.

Nonetheless, this year has produced a good number of fruiting spikes this year. So hopefully this year will be our first macadamia harvest!
(The good news is that the shell of the nuts is so hard that even the rats can’t gnaw their way in…)
Home-made olives
On the back of our verge gardening, a neighbour from down the street asked if it would be reasonable to plant an olive tree next to their house. Of course I said: go for it!

Fast forward only a few years, and the small tree started producing olives. They sat on the tree, ripening, and eventually starting to fall onto the street. So you know me: I hate seeing something go to waste…
So we took a small ladder around, and harvested about half a bucket’s worth. Not a huge amount, but still quite a few.

Now olives can’t be eaten fresh, as they contain a very bitter substance that needs to be treated away. A bit of Googling found an excellent resources from the University of California titled Olives: Safe Methods for Home Pickling.
It outlines seven different methods, and I chose the kalamata-style approach.

This involves soaking/fermenting the olives in water for 20 days, changing the water each day.

After that, the olives were pickled in a mix of brine and red wine vinegar. (My home-made vinegar, by the way, created from left-over bottles of wine.)

Now I don’t actually like olives, but I’m assured that the results were excellent (a ‘very mild’ flavour, and ‘the best olives I’ve had’). Now I can’t confirm the veracity of these statements, but it was a fun process, and actually not very labour intensive.
All in all, it was a good proof of concept, and I think I’ll give it another go next season, if there’s a good crop…
Making progress with our railway plantings

The key to guerrilla gardening is to be indifferent to the survival of any one plant, while remaining passionate about the success of the garden as a whole.
In the year since I last blogged about our guerrilla gardening along the railway line, there has been plenty of progress, and a fair share of setbacks.
First the challenges:
- The railways folks decided to replace the electricity substation right next to the garden, leading to trucks being squeezed down the pedestrian pathway, crushing a pile of plants. (Their reworking of the security fence also killed off a bunch more.)
- Pretty much all of the groundcovers were wiped out by the big hailstorm.
- Local kids keep stealing the stakes used to hold the plant guards.
- Plants are randomly damaged, by dogs or passing people.
- Some plants simply don’t survive the harsh conditions.
But the good news:
- The garden has been progressively extended, and it’s now 10+ metres in length.
- The more established plants are now growing strongly, including all the acacias and callistomons.
- I’ve grown most of the plants from cuttings, so the cost has been minimal.
- Surprisingly few plants have been stolen.
The key is to keep planting each weekend, to replace the 2-3 plants that are damaged, and to then get slightly ahead. Over a year, this makes a big difference, and the pace should progressively increase.

I’ve had plenty of great comments from the locals, and it’s an enjoyable challenge. While it’s still early days, I think I’ve proved that one person can have an impact.
What can you do in your local area? 🙂
Second try needed: straw bale garden

When I came across the idea of straw bale gardens, it seemed like the perfect way of getting greater productivity out of the guerrilla-gardened food forest out the back.
As can be seen in the photo above, the garden didn’t work out well in practice. There were two main reasons: the hailstorm, which wiped out most plants; and the local birds who ate the rest.
I had a second attempt by planting a new round of seedlings, but we were then deep into winter.
So I decided to call it quits — but this is where straw bale gardens deliver their second benefit — by providing free mulch to spread around the garden.

It was easy to break off ‘cakes’ of the straw, and to layer them around the fruit trees. Fifteen minutes of work, and it was all done.

Of course, the chickens thought this was great! So within a day, they’d re-spread the hay so it was evenly covering everything. With a bit of rain, this is all breaking down nicely.
The idea of straw bale gardens remains sound, even if the first attempt was a dud. So I’m going to give it another go, this time earlier in the season. I’ll report back…
Death gets in the way of life

The Lewisham House blog has been very quiet in recent months. This was due to my mother, Andrea, suddenly passing away at the end of April. At the age of 67, we had no warning, and were expecting to have her with us for many decades yet.
Mum and I had a shared passion for gardening, swapping produce, seeds, and assistance. Her large apartment had a wrap-around balcony on all four sides, packed with hundreds of plants of every type.
One of the challenges was to find a home for these plants. This ultimately turned into an opportunity for her gardening passion to live on.
Her fruit trees went into the guerrilla gardened food forest out the back. The natives went into the guerrilla gardened strip alongside the railway station. And the rainforest plants created an instant jungle behind our back fence, shown above.
It’s nice to think that these will live productively for many years, tended as carefully as she would have…
Our first proper harvest of apples

Four years ago we started planting out our guerrilla-gardened food forest in the land behind our house. This included nine different varieties of apple trees, alongside a mix of citrus and other fruit trees.
While we had a tiny harvest two years ago, this is the first year that we’ve had a reasonable harvest.
The Jonathon variety is by far the strongest tree, and the most prolific producer of fruit. We’ve also got a good crop of local Granny Smith apples on the way.
The trees have been very hit-and-miss so far. Some years it’s been the weather, with a lack of rain during key spring growing period. Fruit fly attack is also a constant problem (I’ll post shortly about our bamboo-and-netting solution.)
Still, we’ve harvested two full bucket loads of apples so far this year, with more to come. That’s a lot of apples for two people to eat.
While a many of the apples are blemished or marked externally, they have wonderfully pale green flawless flesh. Not to mention a crispness and depth of flavour that you just don’t get in supermarket apples that have been sitting in a cool store for upwards of six months. Yum! 🙂
Expect more posts shortly on apple-related preserves 🙂

Kicking off a straw bale garden

For a long while now I’ve wanted to do two things: grow sweet potato (kumera), and have vegetables in the guerrilla gardened land behind our house. When I stumbled across the book Straw Bale Gardens, it seemed like the perfect answer to both desires.
Straw is the bundled stalks of harvested wheat, and it acts like, well, straws, sucking up and holding onto moisture. I sourced six bales from the friendly folks at Kensington Produce, piling them into my ute.

The concept is a simple one: lay out a number of straw bales, with the ‘spiky side’ facing upwards. These act as the base of a no-dig garden bed.
For the first two weeks, the straw bales get a few handfuls of fertiliser each day, and plenty of water. This kicks off the breakdown of the bales (straw by itself has very little nutrient).
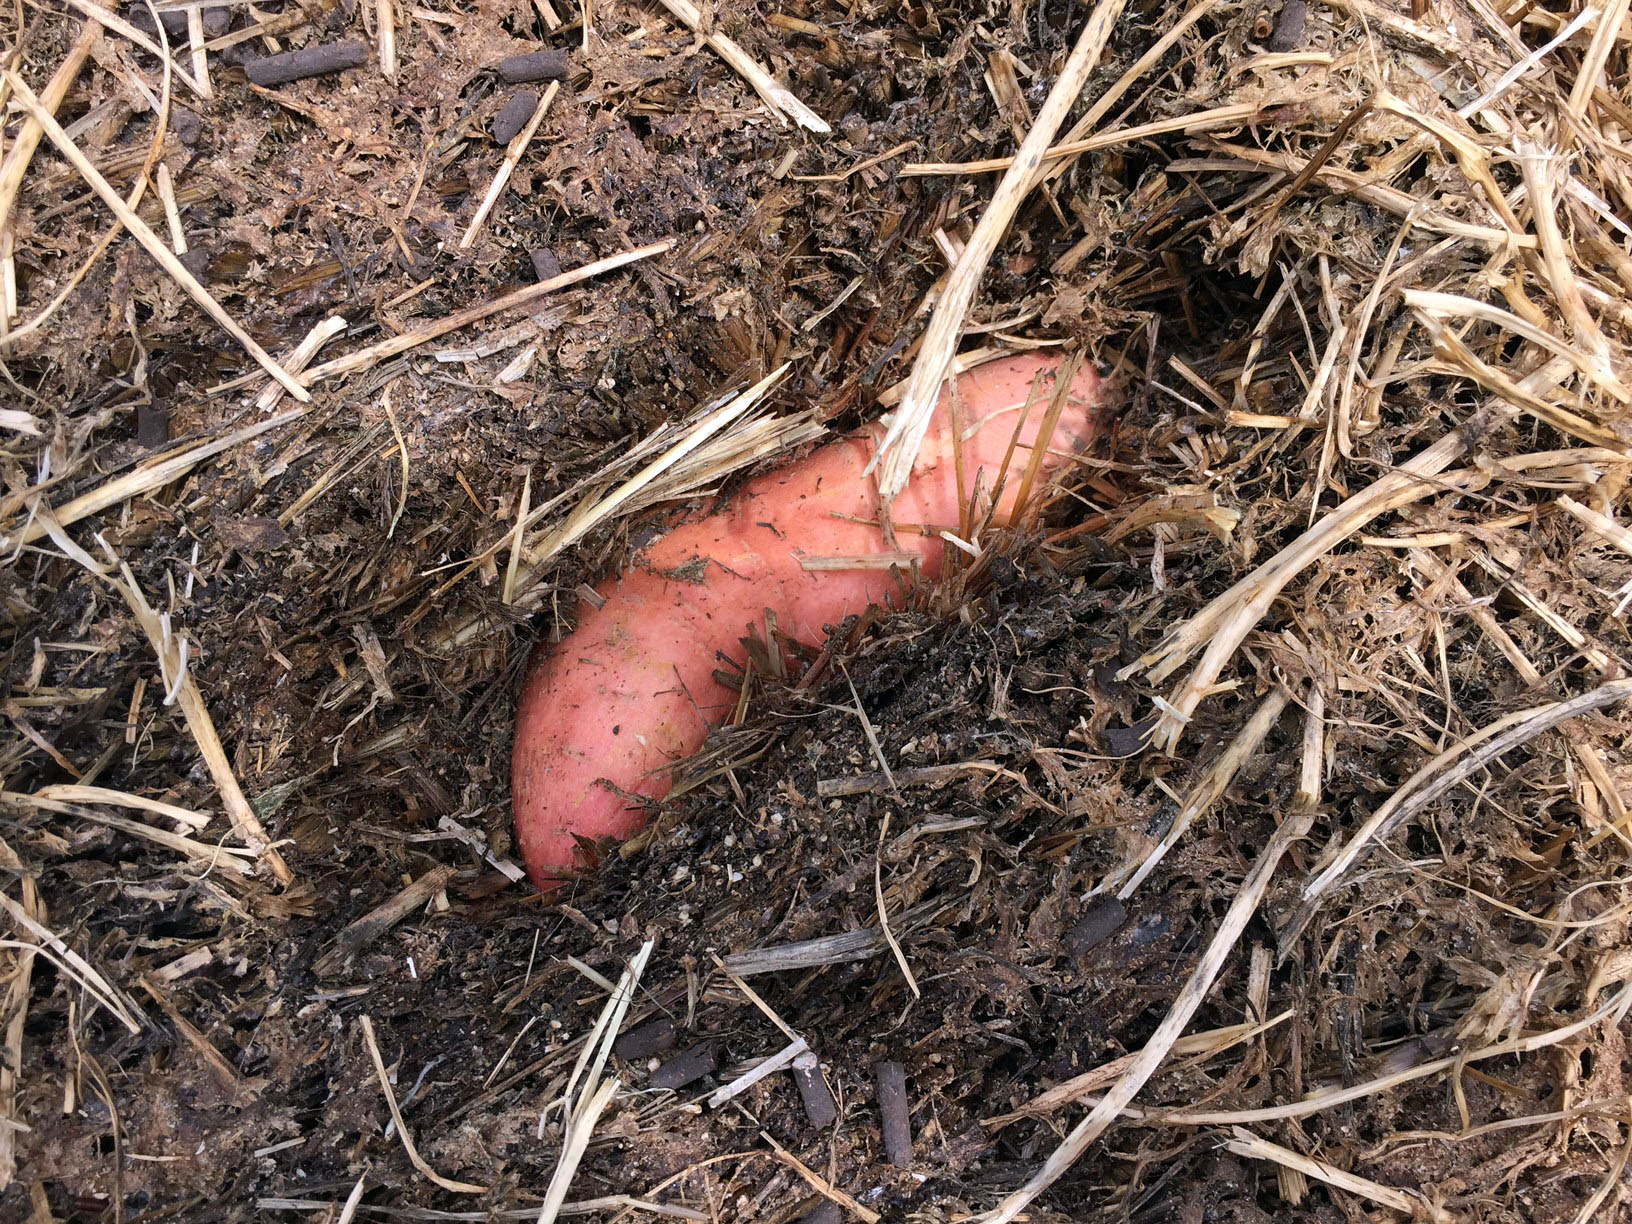
Before planting anything else, I nestled a number of sweet potatos (kumera) into the straw (these babies are the main reason I created the garden). In theory I was supposed to let them shoot first, but I couldn’t wait — fingers crossed it works!

A soaker hose was then laid out across the bales, and then the bales are covered an inch-thick layer of potting mix. I then planted seeds of a mix of different quick-growing vegetables, including lettuce, green beans and amaranth, plus some strawberries.

The straw bales are already encouragingly warm, so hopefully this will encourage seed germination. I’ll report on progress over the next weeks and months.
As a final note, I’d strongly recommend the Straw Bale Gardens book. It’s a simple concept, but clearly and powerfully communicated. Joel’s garden design is more evolved that the simple version I’ve created, so I’d encourage you to get a copy and start planting!
