Making our own
Making fire starters
I recently stumbled on a recipe to make fire starters using dryer lint and wax. We have plenty of both, plus a fireplace at the farm, so I thought I’d give this a go. It’s so easy!

First I put the dryer lint into the seperate portions of an egg carton. Meanwhile I melted beeswax. Then I poured the hot beeswax over the lint. Once the wax had soaked into the egg carton and hardened, I cut around each fire starter with scissors to make 12 fire starters.

Given that all the ‘ingredients’ are extremely flammable, the fire starters work perfectly, as good as the (toxic-smelling) fire starters you can buy in any hardware or camping store.
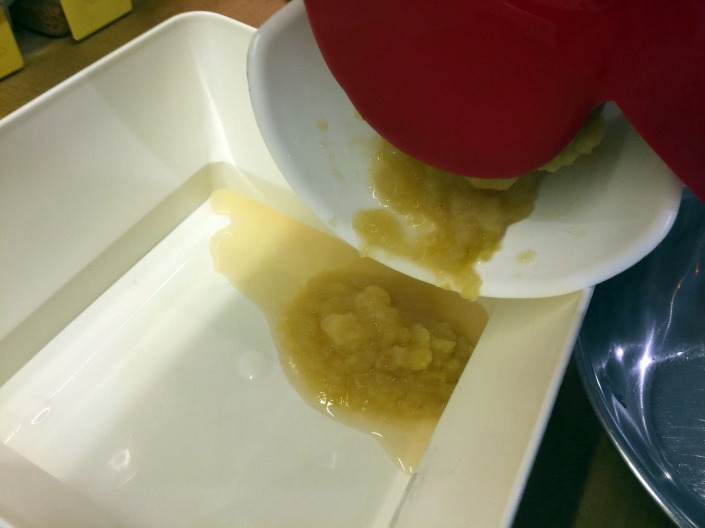
We have plenty of beeswax!

This is what 2.5kg of pure beeswax looks like.
One of the many advantages of Warré hives is that the bees draw new comb each season, meaning the wax is harvested as well as the honey. This produces a lot of lovey chemical-free wax!
(If you’re wondering about the strange patterns, this is the byproduct of pouring the filtered wax into containers that have water at the bottom, to stop the wax sticking.)

We do a variety of things with the wax, including hand lotion, home-made fire lighters and candles (of course!).
We still have plenty of wax left over, so knock on our door if you’d like to buy some for your own projects 🙂
Helping city chickens with country technology
With our time now split between the city and our farm, it’s a bit harder to look after our flock of chicken. While our neighbours are happy to help out (in return for eggs!), the less that has to be done, the better.
Enter some tried-and-tested country technology: the automatic waterer.
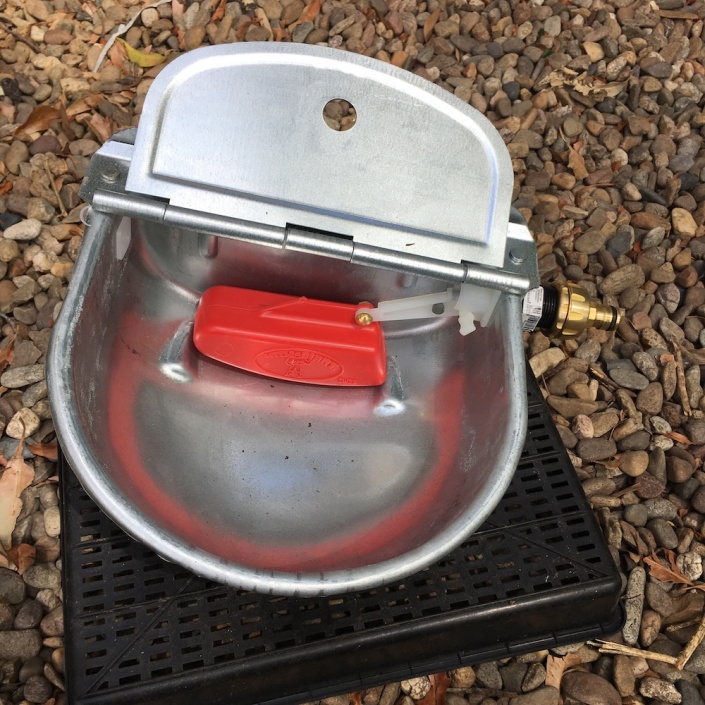
This uses a ‘float valve’ to automatically cut the water when it reaches a specific height. When the animals drink from it and the levels drops, the water source cuts back in.
You won’t find this handy item at the local Bunnings; it is easy to find at a farm supply shop in the country. While it’s intended for horses, cattle, etc it works perfectly well for chickens.
This particular unit comes from the USA, and it has a 1/2″ connection for the water. With a bit of hunting in Bunnings I found a plastic adapter that went from 1/2″ to 3/4″, to which I could then add a standard hose fitting. Then it’s just click in the hose and you’re done.
One less thing to do in this busy life, plus happy chickens!
Home-made wax fire lighters
When browsing Pinterest I came across instructions on how to create home-made wax fire lighters.
With a fair bit of unprocessed wax on hand at the end of the beekeeping season, I was very interested. Particularly for the wood fire down at the farm, in these colder winter months.
I started by melting down a big lump of wax, which you can see contains a fair bit of gunk.

A good friend of ours provides us with big bags of free wood shavings, to use in the chicken coop. I used these to fill up a number of paper muffin cups.

The hot wax then went into the paper cups, the result being (once cooled), a set of unusual-looking fire lighters.

Now I won’t claim that these are as quick and easy as the fire lighting blocks that you can buy. They take a bit of convincing to light, but once they’re going they work well.
They’re particularly effective at restarting the fire each morning, as the coals are still warm from the night before. This primes the wax to light more easily.
If nothing else, these are a great way to make use of available materials that we get for free, namely: wax and wood shavings. Happy days.
Wooden beehive lifter (version 1.5)
While Warré beekeeping is more natural than conventional beekeeping, there are a few practical challenges.
In Warré hives, empty boxes are added to the bottom of the stack (nadiring), rather than being added to the top. This is great for the bees, as it allows them to naturally keep growing comb downwards. It also eliminates all the management needed of brood boxes in conventional beekeeping.
The downside is that the boxes above need to be lifted in order to insert the empty box. Now maybe this isn’t an issue in Europe, where hives are smaller, but it’s a challenge here in Australia. It’s sometimes necessary to lift four boxes, each of which weight 20-30kg. Heave ho!
Now the boxes can be ‘unstacked’, and then restacked with the empty box on the bottom. This is straightforward when the hive is friendly and relaxed, but I have two hives that are a bit ‘tetchy’. They’re wary when I’m working in the top box, and when I break apart the hive, they go wild, attacking in mass. Not good.
Now Warré outlined the design of a ‘hive lifter’ in his book, and this is shown in greater detail in later natural beekeeping books. So it seemed time to build myself a hive lifter!
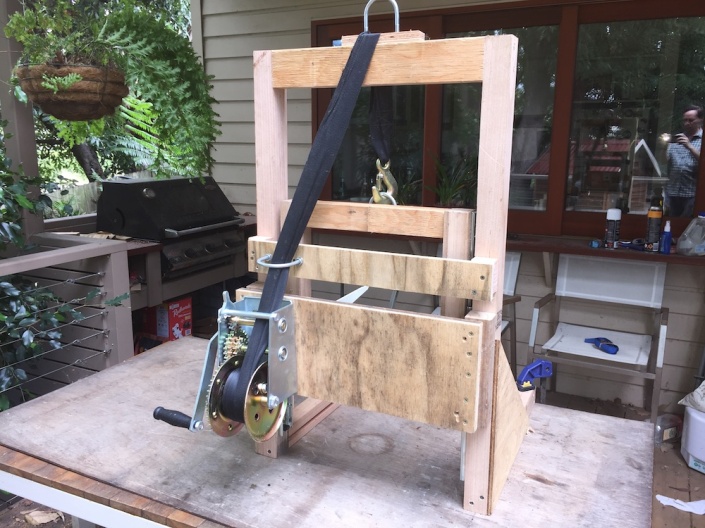
Making a wooden hive lifter

The starting point was David Heaf’s excellent page on hive lifters. This outlined a range of designs, and I started with the first one, the guillotine-like design my Marc Gatineau.
I used lightweight Australian native hardwood for the main pieces, and then routed a slot in the verticals to allow the back-piece to run freely. I obtained a small winch from Aliexpress in China, which cost more in shipping than in the product itself.
However, it didn’t run freely. Under the weight of the hive boxes, the guillotine-like mechanism of the backboard running in slots jammed repeatedly. The problem being the tilting force from the lifting arms.
Back to the drawing board.
Version 1.1 took inspiration from Andy Collins‘ lift. To allow things to run freely, it uses drawer runners, which I ordered from I.R.S.

The hive design also uses support brackets for shelving in retail stores, which are amazingly lightweight and strong.
This one worked! At least for a bit, until the supporting plywood buckled under the weight of use.
Versions 1.2 and 1.3 reinforced various elements of the hive lifter design.

Version 1.4 replaced the big ratchet winch with a much smaller and lighter one. The small one is still more than strong enough.
Which I discovered when I over-cranked the lifter when raising a hive, and pulled apart some of the parts with the sheer force of even this tiny winch.
Version 1.5 was further reinforced and tweaked, and is the currently operating version. (Until I made one from metal, which I’ll outline in a future post).
All up, it’s not a complex thing to build, the the cost is no more than $100 of parts, plus a few weekend’s worth of time. (Compared to $1000 for the cheapest comparable commercial offering.)
And it makes an enormous difference when working with hives, particularly during the super-busy summer harvesting season…
The 1,000 label milestone
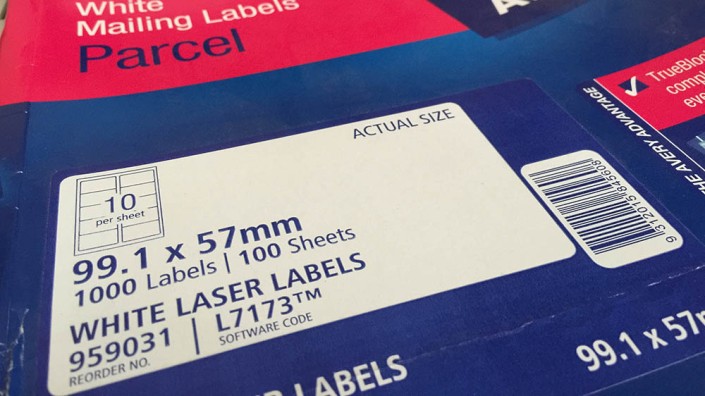
Three years back, we started creating branded labels for the products we produce, starting with some jars of pickled bur gherkins. At the time, I bought a box of 1,000 labels, and Priscilla laughed. A lifetime it would take to get through these!
Well, fast forward three short years, and the box of labels is finished. I’ve done countless jars of honey, chutneys and pickles, not to mention numerous boxes of eggs.
While a fair bit of the produce has been sold to friends and neighbours, more than half has probably been given away. So that’s 500 jars, bottles and boxes of eggs that have come out of our small patch of land, and have gone on to make someone else happy.
Onwards into the second 1,000 box of labels!
Making our own seeded mustard
It was with some anticipation that I picked up a copy of the Cornersmith recipe book. Not only a local Marrickville cafe, but one renowned for pickles and preserves.
My first project out of the book was making our own seeded mustard, which turned out to be delightfully simple (as well as delightfully tasty!).
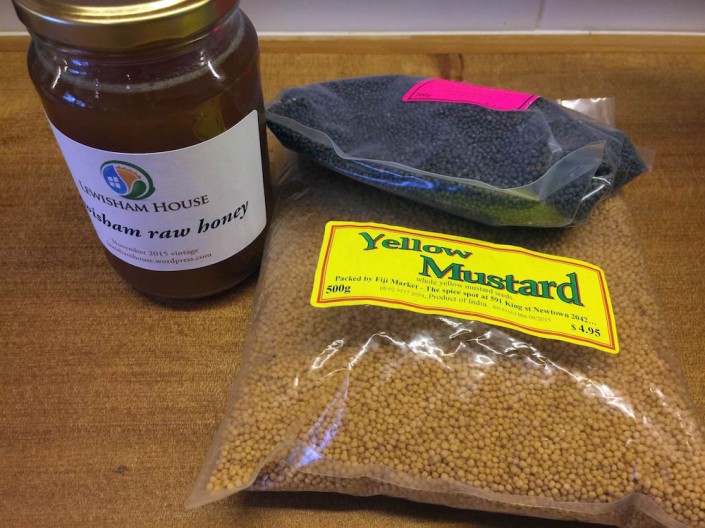
The starting point is generous pile of whole mustard seeds (yellow and brown), which can be obtained very cheaply from your local Chinese or Indian supermarket. To this is added honey (our own, of course!), plus vinegar, and some extra flavourings.

The majority of the mustard seeds are ground down to a paste, using a coffee grinder. The whole seeds are then added back in for texture.
Once everything is combined with the vinegar, it’s left in the fridge for a month, allowing the flavours to infuse together. Then into jars.
The result is every bit as good as the store-bought, for a fraction of the price.

Home-made olives
On the back of our verge gardening, a neighbour from down the street asked if it would be reasonable to plant an olive tree next to their house. Of course I said: go for it!

Fast forward only a few years, and the small tree started producing olives. They sat on the tree, ripening, and eventually starting to fall onto the street. So you know me: I hate seeing something go to waste…
So we took a small ladder around, and harvested about half a bucket’s worth. Not a huge amount, but still quite a few.

Now olives can’t be eaten fresh, as they contain a very bitter substance that needs to be treated away. A bit of Googling found an excellent resources from the University of California titled Olives: Safe Methods for Home Pickling.
It outlines seven different methods, and I chose the kalamata-style approach.

This involves soaking/fermenting the olives in water for 20 days, changing the water each day.

After that, the olives were pickled in a mix of brine and red wine vinegar. (My home-made vinegar, by the way, created from left-over bottles of wine.)

Now I don’t actually like olives, but I’m assured that the results were excellent (a ‘very mild’ flavour, and ‘the best olives I’ve had’). Now I can’t confirm the veracity of these statements, but it was a fun process, and actually not very labour intensive.
All in all, it was a good proof of concept, and I think I’ll give it another go next season, if there’s a good crop…
Enjoying then preserving our apple crop
With our first good crop of apples this year, there have been plenty of apple-based recipes. This includes a delightful apple and marmalade cake from River Cottage: Fruit every day!, plenty of apple crumbles, apple pies, and the like.
Still, two people (even with friends) can’t easily get through four buckets of apples. So onto preserving!
I started by creating some jars of apple and mint jelly, using a recipe from Preserves: River Cottage Handbook No.2.


The apples are cooked down whole, pips and all, until soft. The pulp is then strained through a muslin cloth (or equivalent) over night. The resulting liquid (thick with pectin) is then cooked with sugar until it sets (this took a bit of convincing!). The result is a light jelly with an enjoyable hint of mint — perfect for roast lamb!

I then moved onto apple sauce. I hunted through my collection of cookbooks, and Canning for a new generation had the simplest and easiest recipe (most of the other ones involved whole days of cooking down the fruit!).

Again, the fruit is cooked whole until soft. It was then passed through my passata machine, which separated out all the pips and skin. The pulp is heated until boiling, and then put into mason jars. These are processed in hot water until properly sterilised.
The final preserve was a straightforward fruit wedges in syrup, using instructions out of Ball Complete Book of Home Preserving. This was the quickest process of all: peel and core the fruit, and cook briefly in a light syrup. Then jar and process in a hot water bath for 20mins.

I’m pleased with my collection of apple preserves, and I’m looking forward to using them throughout the cold winter days to come 🙂
Making things with bamboo

As part of a book order last year, I picked up a copy of Bamboo Rediscovered by Victor Cusack. This wonderful book draws on decades of experience to show that bamboo doesn’t have to be an invasive monster, and that bamboo poles are tremendously useful, in the garden and elsewhere.
So when it came to protecting our apple harvest against fruit flies and other pests, I turned to bamboo. I sourced a bunch of 3m long poles from All Stakes Supply, who had them delivered to me in just a few days.
Now, how do I actually tie bamboo stakes together into useful structures? Youtube to the rescue, with several handy tutorials on tying square knots. These are the instructions I ended up following:
The first use was to create a support structure for my tomatoes. (It’s enormously high, by the way, so I didn’t have to cut the bamboo poles, thus retaining them for later uses.)

I also created box frames around my key apple trees, covered by insect netting. The result is rather impressive looking, I think.
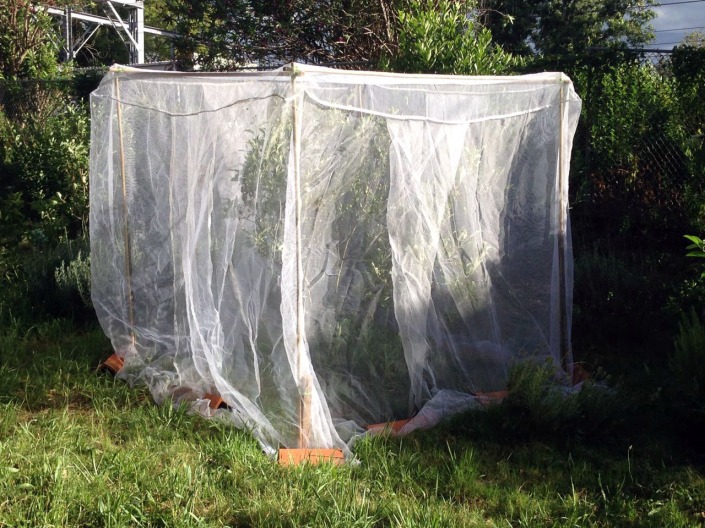
Full disclosure: my knot skills are still pretty patchy, so some of the frames held up, and others slowly slipped apart. Practice makes perfect!
I now have a good collection of robust bamboo poles, which should last many years, and be useful for a dozen different projects.
(Inspired by the book, I also planted out a number of clumping bamboo varieties in the land behind our house. These should grow to give us better screening from the railway line, and I’ll blog about them at a later date.)
