Cooking
Pickling large cucumbers
Late in the season I planted two cucumber plants, with no great hopes for them. In Sydney’s hot and humid climate I’ve found that cucumbers, zucchinis, etc are killed off by powdery mildew long before they produce any real crop.
This time was different, and we were quickly overwhelmed by a glut of cucumbers, some of which had grown quite large.
Sandor Katz to the rescue! His book Wild fermentation — which really kick-started the recent fermentation movement — provided a useful recipe for sour pickles.
Undeterred by the fact I didn’t have lots of tiny “pickling cucumbers” I instead cut my big cukes into thin half-discs. The recipe suggested including grape or oak leaves to keep the pickles crisp, so I scavenged some oak leaves from the convent next door.

Into a big jar went the cucumbers, along with peppercorns, garlic cloves and dill flowers. I added an airlock, and left it to blip away for 3 weeks. And they behaved themselves perfectly: they didn’t bubble up and out the airlock, no mould grew on the surface, and the cucumber slices kept their shape.

We ate some slices today on a ham sandwich, and they are delightfully tart. Another win for Sandor, thanks!
Sweet potato as a source of greens

That mound of green is one of our current success stories in the garden, but not in the way we expected.
It’s sweet potato, and it’s the best example of my pivot from temperate to sub-tropical plants, matching the shift in Sydney’s climate. It isn’t eaten by slugs, snails, caterpillars or other bugs. It’s not affected by powdery mildew, rusts or other fungal diseases. It’s not even slightly stressed by 40deg heat.
Last season, however, it completely failed to provide edible tubers. Doh 😦
And then I saw on Gardening Australia that sweet potato leaves are edible. Eureka!
They’re treated like spinach leaves, steamed, fried or sautéed. They’re delicious, and we use them in salads, as a green alongside meat, or in stir-fries.
They’ve become all our all-year, all-weather source of greens. But let’s hope that this season they also give us actual sweet potatoes!
Drying our own (uncommon) herbs
Dried herbs are a pantry staple, used in everything from roasts to pasta sauces. While they’re easily obtainable in every supermarket, it’s nice to make your own.
Particularly when you’re drying herbs that simple can’t be found in shops.

Pineapple sage, apart from being loved by bees, makes a delicious tea. Infuse a teaspoon’s worth of herbs for 5mins, and then drink with delight.

Lemon-scented tea tree (leptospermum peteronii) has a lovely lemony taste, as the name would suggest. Distinctly different from a lemon, the dried herb can nonetheless be used as a replacement for lemon in soups, etc.

All of these herbs were dried in our cool cupboard, and the biggest effort is plucking off the leaves to store them.
What herbs are you drying from out of your garden?
Limoncello
Earlier this year we had a glut of lemons, so I decided to make Limoncello as an experiment. I don’t remember where I found the recipe (it was many months ago when this experiment took place!) but it went something like this:
Ingredients
- 5 lemons
- 1 bottle of vodka
- 200g sugar

Method
- Zest the lemons. Mix the lemon zest with the vodka.
- Add a little bit of lemon juice.
- Close the lid and store it for 2 weeks.
Two weeks later
- In a saucepan, dissolve the sugar over low heat in 160ml of water.
- When the syrup is cool, add it to the vodka.
- If you want to, you can strain the Limoncello to remove some or all of the lemon zest.
- Store for another 4 weeks to allow the flavours to mature (hence why I’m only drinking it now!).
This limoncello is delizioso! It’s best served from the freezer and/or over ice, and a great way to use up some of your excess lemon crop.
Pumpkin and choko dauphinoise

In another of our series of choko recipes, this is a variation on the classic potato dauphinoise, only with pumpkin, choko and radishes.
The method is simple:
Slice the ingredients thinly, using a mandolin or knife.

Then layer the vegetables in a small, high-sided baking dish. Alternate the ingredients, adding small knobs of butter as you go. I also added some dried sage (home-made of course!), salt and pepper.
Then pour in cream, to come up the level of the vegetables.
Bake in a 180°C oven for 45mins. I then added a layer of grated cheese (why not!), and baked until golden brown.

The result was delicious with pork sausages and peas 🙂
Sauteed choko with tarragon
As posted earlier, we have a lot of choko, kilos worth. Thankfully we’ve discovered that it’s actually delightful, not the horrible make-do vegetable of reputation.
To demonstrate this, I’ll share a few recipes that we’ve used to get the most of choko, starting with sauteed choko.

Sauteed choko with tarragon
Cut the choko into thin “chips”, discarding the outside skin if tough.
Heat up olive oil in a frying pan, with some butter.
When the oil and butter starts to foam, add the choko, along with a sprinkling of dried tarragon.
Toss in the oil, and cook until the choko is tender, when tested with the point of a knife.
Add salt and pepper to taste, and serve!
This works wonderfully alongside meat, such as a steak or sausages. Yum!
A giant windfall of choko

This is what 22kg of chokos look like, 56 fruit in total.
Two days ago, we had a day of very strong wind as a cold front went through. This dislodged the ripe fruit in our choko vine that had grown all the way up into the trees. A single vine, that is, and there’s still fruit on it!
I needed to get a left-over grain bag to collect them all, and a bunch of them had cracked when the landed on the convent driveway next door. No matter, we’re steaming the broken ones to feed to the chickens, which they love!
The rest we’re eating. Expect to see a bunch of choko recipes posted to the blog over the coming weeks… 😉
Making our own seeded mustard
It was with some anticipation that I picked up a copy of the Cornersmith recipe book. Not only a local Marrickville cafe, but one renowned for pickles and preserves.
My first project out of the book was making our own seeded mustard, which turned out to be delightfully simple (as well as delightfully tasty!).
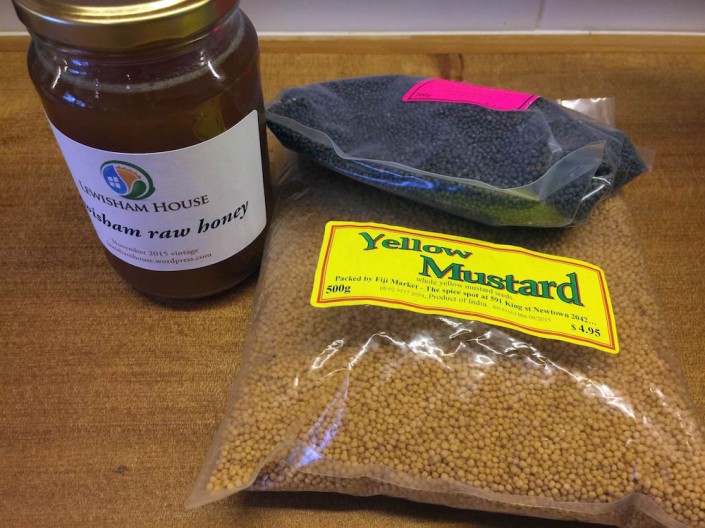
The starting point is generous pile of whole mustard seeds (yellow and brown), which can be obtained very cheaply from your local Chinese or Indian supermarket. To this is added honey (our own, of course!), plus vinegar, and some extra flavourings.

The majority of the mustard seeds are ground down to a paste, using a coffee grinder. The whole seeds are then added back in for texture.
Once everything is combined with the vinegar, it’s left in the fridge for a month, allowing the flavours to infuse together. Then into jars.
The result is every bit as good as the store-bought, for a fraction of the price.

Making beet-kraut

It’s a well-understood phenomena of growing your own vegetables that you’ll inevitably end up with gluts of produce throughout the year. This season, it was beetroots.
The small ones we baked in the oven with olive oil and thyme, but that still left us with some monster beetroots.
The book Fermented Vegetables provided an easy solution. Organised by vegetable, this great book provides a heap of basic (and more exotic) ways of fermenting, plus recipes that make use of the results.
In this case, I created a straightforward “beet-kraut”. Four big beetroots were grated in minutes, using my food processor. To that, I added half a red cabbage, to introduce the vital lactic acid bacteria.
Combined with a small amount of salt, the bright red mix was packed into tall Mason jars, with airlocks. As the bacteria bubble away they produce carbon dioxide, which forces the air out of the airlock, keeping the vegetables protected against moulds.
About a month later, I decanted the vegetable mix into smaller jars, for final storage in the fridge.
The end result has a sharp sauerkraut hit at the front of the palette, finishing with a strong lingering taste of fresh beetroot. Delicious!
Wattleseed scones

I recently ordered a bunch of “bush food” ingredients from Wild Hibiscus Flower Co, including ground wattleseed, ground mountain pepper, whole native pepperseeds, and whole bush tomatoes.
So with Australia Day last week, I had a hankering to use some of these wonderful native ingredients. Wattleseed scones were the first thing to come to mind.
These are a ‘classic’ bush tucker item, and I’ve heard them mentioned often. They’re also listed on the menus of many restaurants and catering companies.
But how hard was it to find a recipe! I looked through all my native food cookbooks, and spent 45mins searching on Google. I finally found a recipe buried in the middle of a Northern Rivers Landcare PDF.
I ended up varying it a bit, so here’s my version, to help others more easily find a recipe:
Wattleseed scones
150ml cream
½ cup milk
2 tbsp plain yoghurt
Mix together the wet ingredients. Add the dry ingredients, and mix, making sure you don’t overwork the batter.
Spread into a 2cm thick layer, and use cookie cutters to cut out circular scones. Place these side-by-side on a non-stick baking dish, and bake for 10-15mins in a 190°C oven, until brown.
(How were they? Delicious! The wattleseed has a distinctive flavour, almost like coffee, and we had the scones with homemade rosella jam and strawberry jam.)
