First step towards an edible forest garden
As blogged about previously, our long-term goal for our South Coast property is to create an “edible forest garden“, following the books by Dave Jacke.
This week we took the first steps towards this big vision, with the planting of our first fruit trees.
The trees were all transplanted from Lewisham, with the bulk being citrus trees:
- Ruby grapefruit (dwarf)
- Cumquat x 2 (dwarf)
- Meyer lemon x 2 (dwarf)
- Kaffir lime (dwarf)
- Pomegranate (full-sized)
- Aniseed myrtle & Cinnamon myrtle
- Acacia (various, all shrubs rather than full-sized trees)
The plantings were carefully designed in advance to ensure that we get the most out of the trees, with the least maintenance work:
The design was laid out accurately on the ground using triangulation, to ensure that reality matched the plan.

After planting, the patch was sheet mulched, with a layer of cardboard covered by hardwood chip mulch. This should keep the weeds down long enough for the cover crops to do their work.

A few notes on the approach, with references back to Jacke’s book:
- The planting is done in patches, with are then combined to create the overall garden design.
- In this instance, it’s a polyculture patch (design pattern #44 from the book), which is a set of complementary plants that support and assist each other.
- As outlined in our post on citrus guilds, there’s a big focus on nitrogen-fixing plants to support the hungry fruit trees.
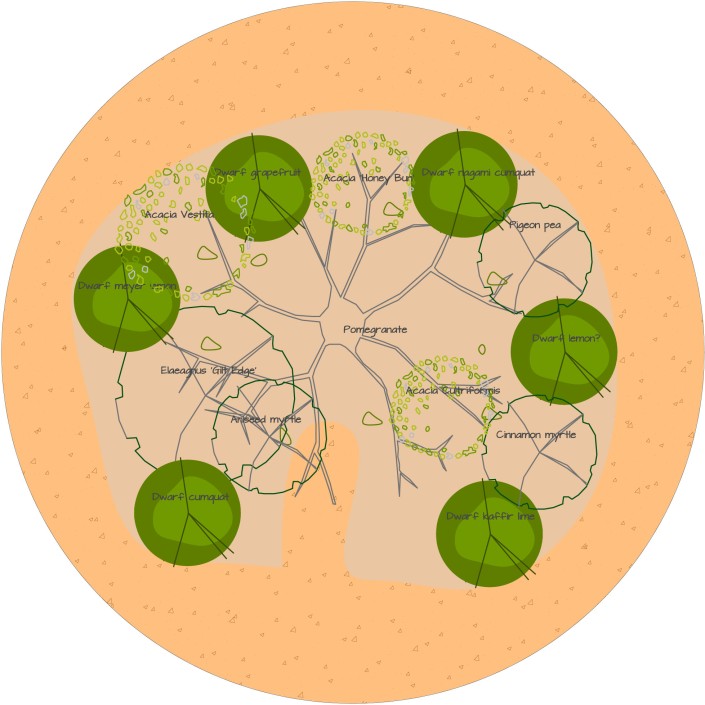
- The diagram above shows the eventual size of the trees (which will be some years off), and to achieve this an approach of instant succession (pattern #31) has been taken. This involves interplanting the gaps in the short term, to direct the eventual outcome.
- There are at least three layers in the patch (pattern #38), from ground covers, to the dwarf citrus up to the pomegranate (which while full-sized, is deciduous).
- A lumpy texture (pattern #39) of larger and smaller plants gives better light access, and confuses the pests.
- I’ve used a number of native species (pattern #43), including acacias (for nitrogen-fixing), plus aniseed and cinnamon myrtles (for culinary purposes).
- Underneath all the plants will be a thick ground-cover layer (pattern #49) that will be a mix of flowering plants to attract insects (pattern #42), and further nitrogen-fixers.
- The patch was fenced, with five strands of tensioned wire. This should deter the wallabies and wombats (note I didn’t say stop the animals, as that would be optimistic!).
All the preparation and planting work was knocked off by dad and myself in three days, making it about a man-week of work in total.

Phew! It’s been hard (but rewarding) work this week to get our first patch in place. I’m sure there will be huge successes and crushing failures to come, watch this space!

September 12, 2017 at 6:57 pm
Are the Acacias for nitrogen fixing? Will you chop and drop them? Or are you planning on a ground cover while the trees establish?
January 7, 2018 at 8:32 am
[…] while we’ve started planting out the first few patches of the edible forest garden, the focus has been on getting the basics of farm infrastructure in […]